Friday, August 9, 2013

Every Living Thing- Brains & Computers

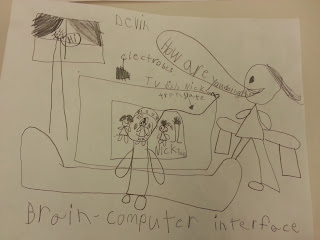
For the last week we studied the brain, learning how it works and then talked about combining the brain with different technologies, mainly brain-computer interfacing and artificial intelligence.  We learned about the main parts of the brain and their functions as well as how the brain sends signals.  The students saw images of the brain, maps of the brain and scans of the brain.  Then we looked at how electrodes can be implanted in the brain or worn in a hat to intercept the brain's electrical signals.  The brain speaks its own language so these signals are translated into something the computer can understand and send to the computer.  We looked at real life examples: prosthetics, typing, gaming, etc.  


After that the students drew out their ideas for a brain-computer interface that they'd like to have:


We talked about artificial intelligence and watched some videos/looked at photos of robots who mimic humans in different ways.


We did a robot programming exercise borrowed from here: 
 The kids split up into groups with a goal of moving from one "x" to the other "x" and also moving an object from one end of a table to the other.  They had to write code from the "dictionary" first and then later got to make up their own, new symbols.  They kids loved robot rules; 1. Robots cannot deviate from their programming (these are not intelligent robots). 2. Robots are pre-programmed to avoid collisions with other robots.  IF robots are colliding they are considered malfunctioning and sent to storage (the empty corner of the classroom by themselves). 


We looked into programming further with Scratch:

The kids also got to interact with robots via the computer:
Students typing messages to and chatting with A.L.I.C.E.


More information and resources:

The Brain-
How to train your robot- http://drtechniko.com/2012/04/09/how-to-train-your-robot/
More robot games- http://engineering-games.net/

Thursday, August 8, 2013

Design & Build It- Machines and 3D Design

During design and build it week we learned about machines and 3D design.  The students were introduced to six basic machines: Wheel & Axle, Inclined Plane & Wedge, Pulley, Lever, Screw and Gears.  They were shown images and videos of some of these machines at work.  Then they split into groups and explored these machines both in the classroom and in science city:


We discussed how simple machines work together to create more complex machines/processes and watched videos of some of these machines.  Then it was time for the students to build their own simple machines through building sets and computer games: 


The next class we learned about Rube Goldberg and Rube Goldberg machines.  We looked at some of Goldberg's cartoons, watched some videos of machines at work and then designed our own.  We first discussed blue prints and plans.
Rube Goldberg's "Professor Butts and the Self-Operating Napkin"


Then we got some more build time:
 
Playing Mousetrap


While half of the class was building the other half took a crack at 3D design with 3DTin
 after looking at some 3D plans for machines, etc.:


More information & Resources:
Arthur Ganson- http://www.arthurganson.com/ - great machines and video on how he makes them

Matter Matters- 3D Printing Week

For matter matters week we focused on 3D printing.  We brought into the classroom Science City's two 3D printers (Ultimaker brand) for the students to interact with:

Science City's Ultimakers   (http://www.ultimaker.com/)

We talked about the process and anatomy of 3D printing.  The 3D printer has a spool of plastic on the back called filiment, this is fed from the back through the tube up top into the extruder.  The extruder heats the plastic up to roughly 180 degrees and higher.  There are different kinds of plastic that are used in 3D printers, which are heated at different temperatures.  The extruder or the bed (the platform which is printed upon) or both move along the x,y and z axes (in three dimensions).  The print is made by layering horizontal layers so that a three dimensional object is made.

We first looked at images different types of printers, then at sample prints to see the horizontal layers/structure.  Then we looked at photos of innovative prints.  We discussed 3D printing techniques for things other fun plastics: plastic prosthetics, biological matter, food, etc.  

Each student got a 3D printed object (a bracelet or a coin) to take home, which were printed on one printer during class while another (more complex/time consuming) print was being made on the second printer.  The students were welcome to both watch the printers and look at 3D printed objects during work time.


We did two sets of projects related to the 3D printers.  The first set of projects were made based on the fact that 3D printers reconfigure their materials (plastic, biological, etc.) into new forms through horizontal layers.  The kids layered yarn (wrapped around other objects with glue), paper (glued in layers) and paper straws (also glued):

 
                                      Paper Straws                                                   Yarn. Object is removed after glue
                                                                                                        dries, leaving only yarn glued into form.

Paper Layers

For the second set of projects we focused on the change in the state of the plastic, the fact that it must be melted in order to become reconfigured in the first place.  We melted wax (crayons) and plastics (beads and spoons) to make new creations out of the materials:

Melted Bead Projects:
  
1. Glue bead design to aluminum foil with glue stick (liquid glue browns when heated).  
The glue is to hold the beads to the foil as you transport everything to the toaster oven to heat it.
2. Heat until melted (time and temp. vary with type of beads, just keep and eye on it).

3. After melting, peel the beads from the foil and have a newly formed plastic object.

Melted Spoon projects:
1. Decorate spoons (or other plastic cutlery) with permanent markers.

 
2. Melt spoons in toaster oven/oven, again just watch them.  They take a while to heat up but once they do they shirnk and get very pliable fast.  Different spoons/plastics will heat up at different speeds/temps.

3. WITH GLOVES!, bend spoons into position desired and hold (~10-20 seconds) until it stays in that shape.  Let cool down another 10+ minutes and you have crazy new spoon-based creations.

Suncatchers:
 
1. Peel and grate crayons.  Your cheese grater is useless for food after this.

2. Sandwich grated wax in between two sheets of wax paper.

3. Melt wax and wax paper sandwich with an iron.
We sandwiched the sandwich in between aluminum foil sheets so as not to ruin the table and iron. 

4. We cut out shapes from our melted wax squares afterwards.

Custom Crayons:
1. Melt crayon wax (peeled crayons) in a crock pot.  You can never use the crock pot for food again.

2. Scoop wax into mold.   3. When it cools you have a custom crayon.

Further resources and information:
Ultimaker 3D printer: http://www.ultimaker.com/

3D printed prosthetics: http://robohand.net/


Our Solar System and Beyond- Exosolar exploration

 This week we focused on exosolar exploration- exploration beyond the bounds of our solar system.  We started by discussing exploration within the solar system- rovers, satellites, probes and telescopes.  We talked about the 8 planets in our solar system and the many dwarf planets, looking at photos of the surface of each.
 
                            (Jupiter)                                                                         (Mars)

The students discussed the characteristics and learned about terrestrial planets and jovian planets.  We learned that there are 882 confirmed exoplanets (http://planetquest.jpl.nasa.gov/) and many others unconfirmed.  Exoplanets are so far away that we don't know much about them, we designed our own planets which we imagined might exist beyond our solar system's borders.


Once they'd designed their planets on paper they made them on the computer using Inkscape:
 (add more planet drawings)

How many planets in our solar system have people been to?  We've only been on one, Earth.  We've been to the moon, which is a satellite of Earth.  But the moon is really close compared to other planets.  We talked about how long it takes to get to the moon, Mars, etc. and how long it would take to get the the edge of the solar system.  We talked about what would be required on a deep space mission and that it would (likely) require generations of people to complete the journey.  They students looked at spacecraft both theorized by current scientists and from science fiction:

  
                         Orion Spacecraft                                                           USS Enterprise 
                               (NASA, Earth)                                     (United Federation of Planets, Star Trek)

Similar to the planet project the students designed their ships' exteriors to be made in Inkscape later.  They also drew diagrams of their ships interiors with all necessary parts- cockpit, laboratory, storage, air & water recycling, a place to grow food, medical facilities, etc.


More information and resources: